Abrasive Blasting for Mold Remediation

By Nick Gromicko, CMI® and Ethan Ward • March 2, 2023

Mold in the Home


Health concerns related to the growth of mold in the home have been featured heavily in the news. Problems ranging from itchy eyes, coughing and sneezing to serious allergic reactions, asthma attacks, and even the possibility of permanent lung damage can all be caused by mold, which can be found growing in the home, given the right conditions.

All that is needed for mold to grow is moisture, oxygen, a food source, and a surface to grow on. Mold spores are commonly found naturally in the air. If spores land on a wet or damp spot indoors and begin growing, they will lead to problems. Molds produce allergens, irritants and, in some cases, potentially toxic substances called mycotoxins. Inhaling or touching mold or mold spores may cause allergic reactions in sensitive individuals. Allergic responses include hay fever-type symptoms, such as sneezing, runny nose, red eyes, and skin rash (dermatitis). Allergic reactions to mold are common.

They can be immediate or delayed. Molds can also trigger asthma attacks in people with asthma who are allergic to mold. In addition, mold exposure can irritate the eyes, skin, nose, throat and lungs of both mold-allergic and non-allergic people.


As more is understood about the health issues related to mold growth in interior environments, new methods for mold assessment and remediation are being put into practice. Mold assessment and mold remediation are techniques used in occupational health. Mold assessment is the process of identifying the location and extent of the mold hazard in a structure. Mold remediation is the process of cleanup and/or removal of mold from an indoor environment. Mold remediation is usually conducted by a company with experience in construction, demolition, cleaning, airborne-particle containment-control, and the use of special equipment to protect workers and building occupants from contaminated or irritating dust and organic debris. A new method that is gaining traction in this area is abrasive blasting.

Abrasive Blasting


The first step in combating mold growth is not to allow for an environment that is conducive to its growth in the first place. Controlling moisture and assuring that standing water from leaks or floods is eliminated are the most important places to start. If mold growth has already begun, the mold must be removed completely, and any affected surfaces must be cleaned or repaired. Traditional methods for remediation have been slow and tedious, often involving copious amounts of hand-scrubbing and sanding. Abrasive blasting is a new technique that is proving to be less tedious and time-consuming, while maintaining a high level of effectiveness.


Abrasive blasting is a process for cleaning or finishing objects by using an air-blast or centrifugal wheel that throws abrasive particles against the surface of the work pieces. Sand, dry ice and corncobs are just some of the different types of media used in blasting. For the purposes of mold remediation, sodium bicarbonate (baking soda) and dry ice are the media commonly used.


Benefits of Abrasive Blasting


Abrasive (or “media”) blasting provides some distinct advantages over traditional techniques of mold remediation. In addition to eliminating much of the tedious labor involved in scrubbing and sanding by hand, abrasive blasting is extremely useful for cleaning irregular and hard-to-reach surfaces. Surfaces that have cross-bracing or bridging can be cleaned more easily, as well as areas such as the bottom of a deck, where nails may be protruding. Areas that are difficult to access, such as attics and crawlspaces, can also be cleaned more easily with abrasive blasting than by traditional methods. The time saved is also an advantage, and the typical timeframe for completion of a mold remediation project can often be greatly reduced by utilizing abrasive blasting.

Soda-Blasting


Soda-blasting is a type of abrasive blasting that utilizes sodium bicarbonate as the medium propelled by compressed air. One of the earliest and most widely publicized uses of soda-blasting was on the restoration of the Statue of Liberty. In May of 1982, President Ronald Reagan appointed Lee Iacocca to head up a private-sector effort for the project.

Fundraising began for the $87 million restoration under a public-private partnership between the National Park Service and The Statue of Liberty-Ellis Island Foundation, Inc. After extensive work that included the use of soda-blasting, the restored monument re-opened to the public on July 5, 1986, during Liberty Weekend, which celebrated the statue's centennial.


The baking soda used in soda-blasting is soft but angular, appearing knife-like under a microscope. The crystals are manufactured in state-of-the-art facilities to ensure that the right size and shape are consistently produced. Baking soda is water-soluble, with a pH near neutral. Baking-soda abrasive blasting effectively removes mold while minimizing damage to the underlying surface (i.e., wood, PVC, modern wiring, ductwork, etc.). When using the proper equipment setup (correct nozzles, media regulators, hoses, etc.) and technique (proper air flow, pressure, angle of attack, etc.), the process allows for fast and efficient removal of mold, with a minimum of damage, waste and cleanup. By using a soda blaster with the correct-size nozzle, the amount of baking soda used is minimized. Minimal baking soda means better visibility while working, and less cleanup afterward.

Dry-Ice Blasting


Dry ice is solidified carbon dioxide that, at -78.5° C and ambient pressure, changes directly into a gas as it absorbs heat. Dry ice pellets are made by taking liquid carbon dioxide (CO2) from a pressurized storage tank and expanding it at ambient pressure to produce snow. The snow is then compressed through a die to make hard pellets. The pellets are readily available from most dry ice suppliers nationwide. For dry-ice blasting, the standard size used is 1/8-inch, high-density dry ice pellets.


The dry-ice blasting process includes three phases, the first of which is energy transfer. Energy transfer works when dry ice pellets are propelled out of the blasting gun at supersonic speed and impact the surface. The energy transfer helps to knock mold off the surface being cleaned, with little or no damage.


The freezing effect of the dry ice pellets hitting the mold creates the second phase, which is micro-thermal shock, caused by the dry ice’s temperature of -79º C, between the mold and the contaminated surface. This phase isn’t as much a factor in the removal of mold as it is for removing resins, oils, waxes, food particles, and other contaminants and debris. For these types of substances, the thermal shock causes cracking and delaminating of the contaminant, furthering the elimination process.


The final phase is gas pressure, which happens when the dry ice pellets explode on impact. As the pellets warm, they convert to CO2 gas, generating a volume expansion of 400 to 800 times. The rapid gas expansion underneath the mold forces it off the surface.

HEPA Vacuuming


A HEPA vacuum is a vacuum cleaner with a high-efficiency particulate air (or HEPA) filter through which the contaminated air flows. HEPA filters, as defined by the U.S. Department of Energy’s standard adopted by most American industries, remove at least 99.97% of airborne particles that are as small as 0.3 micrometers (µm) in diameter. HEPA vacuuming is necessary in conjunction with blasting for complete mold removal.


While abrasive blasting with either baking soda or dry ice is an effective technique, remediation will not be complete until HEPA filtering or vacuuming has been done. Abrasive blasting removes mold from contaminated surfaces, but it also causes the mold spores to become airborne again. The spores can cover the ground and the surfaces that have already been cleaned. So, the mold spores need to be removed by HEPA filters. Additionally, while some remediation companies claim that there will be no blasting media to remove after cleaning, especially with the dry-ice method, there will be at least a small amount of visible debris left by the blasting that must be removed before HEPA vacuuming can occur. HEPA vacuuming removes all invisible contaminants from surfaces and the surrounding air. When HEPA vacuuming is completed, samples at the previously contaminated areas should be re-tested to ensure that no mold or mold spores remain.


Abrasive blasting using dry ice or baking soda, combined with HEPA-filter vacuuming, is an effective method for mold remediation. InterNACHI inspectors who offer ancillary mold inspection services should be aware of the benefits and applications of this technique adapted for remediating mold in homes.


A person is holding a drop of water in their hand.
March 4, 2025
When buying a home, most buyers focus on structural integrity, electrical systems, and HVAC performance. However, one critical aspect that often goes overlooked is water quality. Whether you're purchasing a new home, living in a rural area with a private well, or simply ensuring the safety of your drinking water, water testing is essential.
March 3, 2025
For homeowners hoping to increase overall safety, uncover hidden problems, and improve energy efficiency, residential thermography services are crucial. Thermographic examinations use infrared equipment to detect temperature changes in walls, ceilings, and floors, exposing issues that might not be seen during a visual inspection.
A man wearing a hard hat and safety vest is holding a clipboard and looking out a window.
February 11, 2025
As winter approaches in the Hudson Valley, homeowners should take proactive steps to protect their properties from harsh weather conditions. As a home inspector, I’ve seen firsthand how winter-related damage can lead to costly repairs.
A person is fixing a door lock with a key.
By ick Gromicko, CMI® November 13, 2024
There are a number of measures that homeowners can take to ensure that their homes are not attractive to burglars. If clients are concerned about break-ins, inspectors can pass on to them basic strategies for burglar-proofing their homes.
The inside of a furnace
By Nick Gromicko, CMI® May 14, 2024
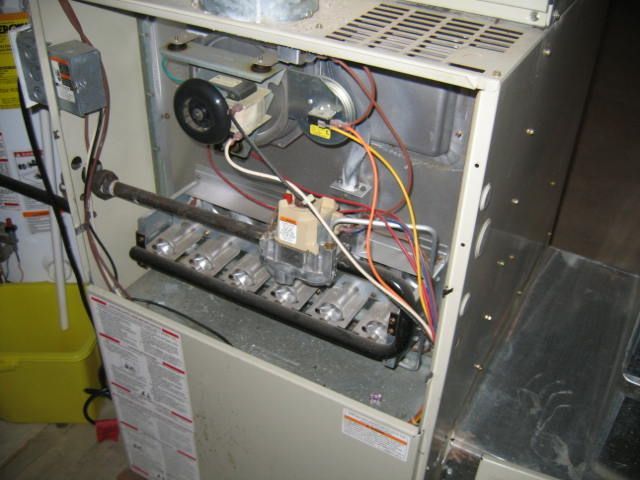
Carbon monoxide (CO) is a colorless, odorless, poisonous gas that forms from incomplete combustion of fuels, such as natural or liquefied petroleum gas, oil, wood or coal. Carbon Monoxide Poisoning and Detectors
By Danna R February 14, 2024
Mold is a byproduct of the breakdown of organic matter, such as plants, wood, and even food and certain beverages. The problem posed to humans by mold is their spores, which can be released into the air and land on damp surfaces indoors, where they will continue to grow, if the conditions are right. Mold growth left unaddressed can quickly spread and result in damage to the structure of a home. More importantly, mold can compromise the respiratory health of susceptible individuals. Although testing for mold falls outside InterNACHI's Residential Standards of Practice , home inspectors can benefit from getting trained in mold testing and offering this valuable – and sometimes life-changing – service to their clients.
By Nick Gromicko, CMI® September 7, 2023
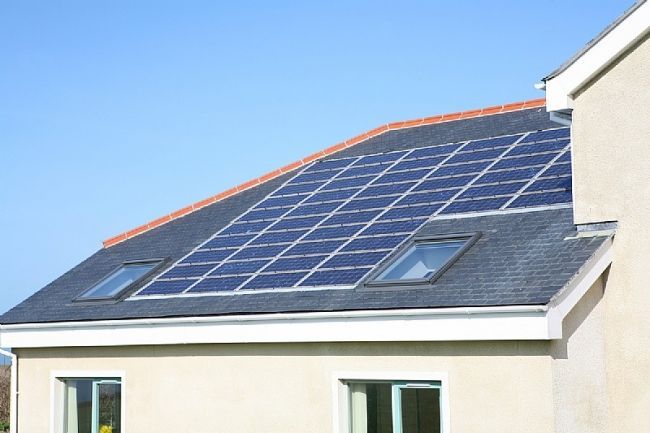
Solar energy offers considerable advantages over conventional energy systems by nullifying flaws in those systems long considered to be unchangeable. Solar power for home energy production has its flaws, too, which are outlined in another article, but they're dwarfed by the advantages listed below.
By By Nick Gromicko, CMI® and Ethan Ward June 22, 2023
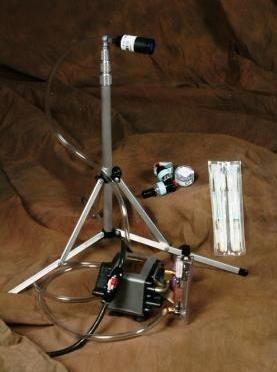
Mold in the Home Taking air samples during a mold inspection is important for several reasons. Mold spores are not visible to the naked eye, and the types of mold present can often be determined through laboratory analysis of the air samples. Having samples analyzed can also help provide evidence of the scope and severity of a mold problem, as well as aid in assessing human exposure to mold spores. After remediation, new samples are typically taken to help ensure that all mold has been successfully removed. Air samples can be used to gather data about mold spores present in the interior of a house. These samples are taken by using a pump that forces air through a collection device which catches mold spores. The sample is then sent off to a laboratory to be analyzed. InterNACHI inspectors who perform mold inspections often utilize air sampling to collect data, which has become commonplace.
By Kenton Shepard February 8, 2023
Above: garage exterior This is the exterior of a townhome I was asked to inspect. During the inspection, I ran into a neighbor who told me that the roof of another garage, identical to the one pictured above two buildings down, had collapsed the previous winter under a snow load. So, I decided to keep my eyes wide open as I went through the garage.
By Hudson Valley Home Inspections LLC January 14, 2023
Most people don't know how easy it is to consume less at home, and InterNACHI wants to change that. A drastic reduction in the cost of heating, cooling and electricity can be achieved with simple changes, most of which can be done by homeowners themselves. Of course, for homeowners looking to benefit from the latest energy-efficient housing know-how and systems, InterNACHI's energy auditors can perform extensive testing to find the best energy solution for your home. Why have a more energy-efficient home? Here are some good reasons: Federal, state, local, and utility financial incentives, such as tax relief, are very beneficial in most of the United States. It saves money. It costs less to power a house that has been converted to be more energy efficient than a conventional house. It increases interior comfort levels. It reduces the climate impact. Many scientists today believe that excessive energy consumption contributes significantly to global warming. It reduces the level of pollution. Conventional electrical power generation creates pollutants that are found in air, land and water resources. 1. Find a better way to heat and cool your home. More than half of the energy used in our homes is for heating and cooling. Here are some suggestions for reducing energy bills through adjustments to heating and cooling systems: Install a ceiling fan. A fan can be used instead of air conditioning, which requires a large amount of energy. Regularly replace air filters in air conditioners and heaters. Set the thermostats to an appropriate temperature. Specifically, they should be lowered at night and when no one is home. In most homes, you can save about 2% on the electric bill if you turn the thermostat down one degree for eight hours each day. For example, lowering the thermostat from 75° F (24° C) to 70° F (21° C) can save 10% on heating expenses. Install a programmable thermostat. A programmable thermostat saves money by automatically turning down electrical heating and cooling appliances when no one is home and at night. Programmable thermostats are mercury-free and, in some climate zones, can save up to $150 per year on energy costs. Install a wood boiler or a pellet boiler. They create more heat than a stove. At night, draw the curtains on the windows for better insulation of the room. 2. Install a tankless water heater. On-demand water heaters (tankless or instantaneous) provide hot water only when it is needed. They do not produce the excess wasted energy associated with tank water heaters, saving energy costs. On-demand water heaters heat the water directly, without a hot water tank, thus avoiding heat loss linked to the reserves that traditional water heaters with reserve have. When the hot water tap is turned on, cold water runs through a pipe to the dwelling. A gas burner or electric element will heat the water. As a result, on-demand water heaters deliver a constant supply of hot water. You don't need to wait until the hot water tank is filled with enough hot water. 3. Replace incandescent lights. A household spends on average 11% of its energy budget on lighting. Traditional incandescent lights only transform approximately 10% of the energy they consume into light, while the rest is transformed into heat. The use of new technologies in lighting, such as light-emitting diodes (LED) and compact fluorescent lamps (CFLs), allows an energy reduction of 50% to 75%. Advances in lighting control have also saved energy by reducing the time that lights are on but not in use. Here is some information about LEDs and CFLs: CFLs use 75% less energy and last about 10 times longer than traditional incandescent bulbs. LEDs last longer than CFLs and consume less power. LEDs have no moving parts and, unlike CFLs, do not contain mercury. 4. Close, seal and insulate your home. Closing and insulating your home is one of the most cost-effective ways to make a home more comfortable and energy efficient – ​​and you can do it yourself. A well-sealed home can increase comfort and indoor air quality while reducing utility bills. You can hire an InterNACHI Energy Auditor to assess air leaks and recommend repairs to truly increase comfort and energy savings. Here are some common places where leaks can occur: outlets; mail slots; around pipes and electrical wires; wall or window air conditioners; attic hatches; fireplace draft dampers; insulating gaskets around the doors; baseboards; window frames; and switch plates. Because warm air rises, air leaks most often occur in the attic. Homeowners can resort to different repairs and maintenance of their attics that allow them to save on heating and cooling, such as: Plug large holes. In an attic, a large leak is most likely to occur where the attic walls and floor meet, behind and below the attic kneewalls, and in drop ceiling areas. Seal small holes. You can do this easily by locating where the insulation is darker. The dark color of insulation is caused by dusty indoor air that has been filtered through the insulation before leaking through small holes in the building envelope. In cold weather, you may see frozen areas in the insulation. They are caused by warm, moist condensed air, which freezes when it comes in contact with cold attic air. In warmer weather, you will see water spots in these same areas. Use foam sealant or caulking to seal openings around plumbing vent pipes and electrical wires. Cover the areas with insulation once the caulk is dry. Seal the attic access panel with weather stripping. You can cut a piece of fiberglass or rigid insulation board the same size as the attic hatch and glue it to the back of the attic access panel. If you have stairs that you pull up to the attic or a doorway, they should be insulated in the same way. 5. Install an energy-saving shower head and toilet. The following systems can be installed to limit the use of water in a home: a low-flow showerhead. They are available with different flow rates, and some have a pause button that blocks the flow of water when the person taking the shower washes; low-flow toilets. 30% to 40% of the total water consumed in a home comes from toilets, making them the biggest consumers of water. By replacing old 3.5 gallon (13 liter) toilets with newer 1.6 gallon (6 liter) low-flow toilets you will reduce your water consumption by approximately two gallons per flush (i.e. 7.5 liters ), saving you 12,000 gallons (45,425 liters) of water per year. Low-flow toilets usually have a "1.6 GPF" label on the bowl behind the seat or in the tank; vacuum toilets. This type of toilet is made up of a vacuum chamber with a siphonic action that draws air from the hatch below the bowl, allowing it to fill with water quickly to flush out waste. Vacuum toilets are relatively quiet; and two-tier toilet. Two-tier toilets have been used for years in Europe and Australia, and are gaining popularity in the United States. Two-speed toilets let you choose between 1 gallon (4 liters) of effluent per flush and 1.6 gallons (6 liters) of solid waste per flush. 1.6-GPF two-speed toilets reduce water consumption by an additional 30%. 6. Use your appliances and electronics responsibly. 20% of a basic US home's energy bill is for appliances and electronics. Here are some tips for reducing the energy used by electronic devices and appliances: Refrigerators and freezers should not be placed next to the oven, dishwasher or hot air vents, or exposed to direct sunlight. Exposure to heat will force them to use more energy to stay cold. Computers should be turned off when not in use. If you must leave a computer on that is not in use, turn off the monitor. According to some studies, computers are responsible for about 3% of total energy consumption in the United States. Use Energy Star rated energy efficient appliances and electronics. These appliances, approved by the Department of Energy (DOE) and the Environmental Protection Agency (EPA) Energy Star program, include televisions, home theaters, DVD players, CD players , receivers, speakers, and more. According to the EPA, if we used 10% energy-efficient appliances and electronics in our homes, we would reduce carbon emissions, equivalent to 688,000 hectares of trees. Chargers, such as those used for laptops and cell phones, consume power when plugged in. When not connected to electronic devices, chargers should be unplugged from the power outlet. Laptops consume much less power than desktops. 7. Install daytime lighting instead of electric lighting. Daylighting is the use of natural light to illuminate the interior of a home. This can be achieved through these different processes: skylights. It is important that they are double-glazed so that they are profitable. In order to avoid leaks, the skylights must illuminate correctly; reflective tablets. A reflective shelf is a passive device intended to reflect light as far as possible into a building. They can be indoors or outdoors. Reflective shelves can introduce light into a space that is 2.5 times the distance from the floor to the top of the window, and high performance reflective shelves can illuminate up to four times farther; clerestory windows. Skylights are short, wide windows positioned high on the wall. They are protected from the sun in summer by the eaves and in winter they let in the sun, creating natural light and warmth; and light pipes. The light pipes are composed of a special lens that amplifies weak light and reduces the light intensity of the midday sun. Sunlight is channeled through a tube covered in highly reflective material and then enters the living area through a diffuser that has been designed to distribute light evenly. 8. Insulate doors and windows. About a third of the heat lost in a home takes place through windows and doors. Here's how to reduce energy loss through doors and windows: Seal window edges and cracks with caulking rope. This is the cheapest and easiest option. Windows can be caulked with a special coating that is sandwiched between the window and the frame. For doors, caulk all around the perimeter to ensure a proper seal and seal. Install quality door sweeps if they are not already in place. Install double windows for single pane windows only. A removable pane can be installed over an existing window. If your windows are rotten or the wood is damaged, the glass is cracked, the sealant is missing, the sashes are out of adjustment, or the locks don't work, you should fix them or replace them. replaced. 9. Cook smart. A tremendous amount of energy is lost when cooking. The following recommendations and statistics illustrate how to waste less when cooking: Convection ovens are more economical than traditional ovens. They are made up of fans that force hot air to circulate more evenly, allowing food to cook at a lower temperature. Convection ovens consume on average 20% less electricity than traditional ovens. Microwave ovens consume on average 80% less energy than traditional ovens. Pans should be placed on the fire or the correct size heating element. Pans with a lid heat food faster than pans without a lid. Pressure cookers drastically reduce cooking time. When using a conventional oven, food should be placed on the highest rack. The higher rack is hotter and will cook food faster. 10. Change the way you wash your clothes. Do not use the “half load” setting of your washing machine. Wait until you have enough clothes for a full charge, as “half charge” saves less than half the water and energy of a full charge. Avoid any program with a high temperature when your clothes are not very dirty. In a "hot" cycle, water at 140°F (60°C) uses much more energy than at 103°F (40°C), and washing at 140°F is not really more efficient in term of cleanliness. Clean the lint filter before using the dryer, every time. Excess lint not only causes combustion, but will also lengthen the drying time. If possible, air dry your clothes on lines or racks. Spin your clothes either in the washing machine or by hand before putting them in the dryer. Homeowners who take the time to make these changes usually find that the energy savings are worth more than the effort. However, keep in mind that inspectors can make the process easier and can make a more complete estimate of potential energy savings than you. For information on a qualified inspector, visit www.InspectorSeek.com . Ask the inspector if he has been trained to perform an energy inspection. Reference: https://www.nachi.org/10-facons-simples.htm
More Posts
Share by: